Author: Samantha Stevens

My name is Samantha and I have been an Interior Designer for 10 years. Designing is a passion of mine and I love what I do. I also have a green thumb and enjoy gardening in my free time. I live in San Diego which means plenty of sun all year long.

Dealing With Dead Patches in the Lawn

No one likes the look of dead patches in their lawn, so when faced with dead patches most people reach for their bag of grass seed and hope that by some miracle, sprinkling some seeds over the dead grass will be enough to solve the problem. Unfortunately in most cases, this doesn’t enough rejuvenate the dead patch of grass.

So, after this first attempt fails, many people again reach for their trusty bag of grass seed, sprinkle some seeds on the ground, and hope for a different outcome. Some might even add a little fertilizer and water it for good measure, but what can you do if this again isn’t enough t -d your lawn of its dead patches?

Well, first you’ll want remove any dead grass from the area. The easiest way to do this ist grab a shovel, dig up the dead patch and fold the dead grass into the ground. This will also help to loosen up the soil, which will make it much easier for the grass seeds to take root.

Next, you’ll want to sprinkle over your grass seed and add some fertilizer. Be sure to add plenty of grass seed to the affected area so the grass grows in nice and thick when it starts to sprout. Always remember to carefully follow all the instructions for your chosen kind of fertilizer so you don’t end up shocking the grass by over-fertilizing it.

Last, you’ll want to keep the area watered as the new grass is starting to grow, while keeping any kind of traffic – car, bike, foot, or otherwise – off the area. Newly planted grass will be quite vulnerable to drought and damage during its initial growing period and as such, will need to be watered regularly and protected from anything that could damage the newly sprouted grass.

It can be hard to repair a lawn’s dead patches of grass if you don’t know the proper way to do so. If, however, you first remove the dead grass by digging it up and folding it into the ground, your soil will loosen up and your grass seeds will have a much better chance at taking root. By doing this and making sure to properly care for the newly seeded patches in your lawn, you will be well on your way to a healthier looking green lawn in no time.

Conserve Water by Stocking Your Garden with Native Plants

As the fresh water supply is on the decline in many areas, people are continually looking for new ways to conserve water. One little used method of conserving water is to swap out your garden’s current selection of plants for ones that are naturally found in your area. Doing so may require a visit to your local nature reserve or nursery, but in the end, it can be well worth the extra effort.

Though it can take a little research to figure out which plants are native to your area, a good place to start is your local nature reserve. Here you will be able to find an assortment of plants that could do well in your garden. When looking for plants, try to look for ones growing in similar soil conditions to that of your garden. If your garden is typically dry, look for plants that are thriving in sandy or stony soils. If your garden is in a marsh-like or otherwise moist area, look for plants thriving in wetter conditions.

Though most nature reserves do not allow you to dig up and remove their plants, some will allow you to collect seeds from certain areas. Always be sure to check with reserve personnel, however, before removing any plants or collecting any seeds just to be on the safe side.

If you aren’t allowed to remove any plants or collect any seeds from your local nature reserve and are unsure about what a particular native plant is called, then take a few pictures of it and leave a message in a ‘what type of plant is this?’ forum thread. More often than not, a forum member will know exactly what kind of plant it is and will be happy to tell you what it is called. Knowing the name of the plant will allow you to search for it in online seed catalogs and make a purchase.

Another place you can look for plants native to your area is your local nursery. The nursery’s staff should be quite knowledgeable about their inventory and should be able to point out any kinds of plants currently for sale that are native to your area. They should also be able to help you decide which of their native plants would do well in your yard’s typical soil conditions.

Once you have found a native plant to add to your garden, it will be time to prepare your soil. This may include adding some sand, stones, or organic material to help your plant thrive in its new location. For best results, always try to replicate the soil conditions from the plant’s original location.

Also be sure to water any newly planted seeds, seedlings, or plants to help them adjust to their new area and promote growth. Once the plants have sufficiently adjusted to being in your garden, you will be able to wean them off any additional water as your area’s natural rainfall should be more than enough for the plants to thrive.

Do remember, however, that native plants will still need to be watered on occasion. If you are experiencing a drier than normal stretch, be sure to water occasionally so the plants in your garden will survive until the next rainfall. A rain barrel system used to naturally collect rainwater can prove very useful when trying to both conserve water and keep your garden watered during periods of drought.

As native plants will have no trouble thriving on your area’s natural levels of rainfall, they can be a great addition to your water-conscious garden. By choosing to use plants that are native to your area instead of ones imported from around the world, you won’t have to water your garden nearly as often as before, allowing you to conserve more water around the yard.

Is It Safe to Use Old Aquarium Water on Your Houseplants?

If you are serious about conserving water, then the thought of watering your houseplants with old aquarium water has probably crossed your mind. Is this a safe way to reuse old aquarium water or can such water be harmful in any way to your houseplants? The general consensus is that old aquarium water is both safe and beneficial to your houseplants in most cases.

So long as you haven’t added any salt, chemicals, or medication to your aquarium, then the water should be safe to use on your houseplants. Your plants will also benefit from any fish waste contained in the old aquarium water, as it makes for an excellent natural fertilizer that will help your plants to thrive.

Cuttings from your houseplants can also benefit from your old aquarium water and often root much faster in nutrient-rich aquarium water than regular tap water. To give an extra boost to your cuttings, try floating them inside your actual working aquarium, where they will also benefit from the oxygen-enriched aquatic environment.

There are many benefits to be had from using old aquarium water on your houseplants. Just be sure that you only use unsalted aquarium water that is free from both harmful chemicals and medications. This way you will have a safe and naturally fertilized water source that will help your houseplants to grow and thrive.

How to Rid Your Kitchen of Unpleasant Cooking Smells Using Pine-Sol

Do you find that unpleasant cooking smells linger around your kitchen for days after you’ve cooked and eaten certain foods? Have you been looking for a way to get rid of these smells, but have so far come up empty? Well, as it turns out, the solution to your problem could be as easy as pouring some Pine-Sol in your sink. For a more detailed look at how you can easily deal with this common kitchen problem (including the complete, yet incredibly simple instructions), keep on reading.

The first thing you’ll need to do to remove your kitchen’s unpleasant cooking smells using Pine-Sol is, you guessed it – get a bottle of Pine-Sol. Original scent Pine-Sol works well, but some people prefer to use one of Pine-Sol’s other scents. Lemon Fresh and Lavender Clean are two of the more popular options, but feel free to give any of the alternate scents a try if you feel like experimenting.

Once you have gotten your hands on a bottle of Pine-Sol, simply fill your sink with regular tap water (any temperature will do fine) and add two cups of Pine-Sol to the water. Give it a little stir and then let the mixture sit for a number of hours. That’s all there is to it! Please be sure to keep any pets or small children away from the sink during this time, as drinking the mixture or over-inhaling the fumes can be dangerous.

Keep in mind that this solution is not an immediate fix for all lingering cooking smells and a certain amount of time will be required for the Pine-Sol to work its magic. Though any extended period of time will do (so long as you won’t be needing to use your sink), many people find it most convenient to use the Pine-Sol method either just before going to bed or just before leaving the house for work or another extended activity.

After the water and Pine-Sol mixture has had a chance to sit in the sink for a number of hours, simply drain it out and give your sink a quick rinse. The unpleasant cooking smells should no longer be a problem. If you find that the remaining scent of the Pine-Sol is a little too strong in your kitchen, be sure to open some nearby windows or use a fan to help disperse the smell throughout your home.

Can Pet Allergy Sufferers Improve Their Home’s Air Quality While Still Owning Pets?

Air quality is an important consideration for many pet owners. This is especially true when a member of the household suffers from pet allergies. Pet dander allergies, in particular, leave some people feeling like they have no other option than to either suffer through their allergies or remove their pets from the home. Fortunately, this isn’t always necessary as there are several ways for pet owners to improve the quality of their home’s air, while still enjoying the company of their pets.

One of the most effective ways to improve indoor At quality without having to give up your pets is to install an At filtration system. A high-efficiency system that is designed to capture airborne particulates (like pet dander) is highly recommended, but any At filtration system should help to alleviate mild to moderate pet allergy symptoms.

Regularly scheduled pet baths can also help to reduce the amount of dander in the air, especially when coupled with a special anti-dander pet shampoo. These special shampoos will remove any dander that is currently present on your pet’s coat and skin while moisturizing their skin to prevent any additional dander from reappearing.

Keeping any pets away from designated sleeping areas can also be helpful as pet allergies tend to flare up in the evening and overnight. It is also a good idea to regularly wash any bedding, even in areas where pets aren’t permitted, as pet dander can easily latch onto clothing and travel into pet-free areas.

If an allergy to pet dander has forced you to consider turning your home into a pet-free environment, then you’ll be happy to hear that there are several ways to improve the quality of your home’s At without having to give up your pets. By installing an At filtration system, frequently bathing your pets, and keeping any pets away from your home’s designated sleeping areas, you will significantly improve your indoor air quality and reduce or possibly eliminate any persistent pet allergy symptoms within the home.

Make the Switch to LED Panel Lights

Are you considering switching to LED panel lighting? You’re not alone. More and more people are discovering the benefits of LED panel lights and are considering a switch away from their old fluorescent or incandescent light bulbs. So, why are LED panel lights worth switching to? Read on to find out.

The first reason many people consider installing LED panel lighting is its appearance. White LED panel lights are very simplistic in nature but can create a bright and modern-looking space. Colored LED panel lights, on the other hand, can completely transform an area, leaving it rich with atmosphere.

Another reason people are considering LED panel lights is because they have a longer lifespan than their incandescent or fluorescent counterparts. The quoted lifespan for many LED panel lights is upwards of 50,000 hours. Compare this to the typical lifespan of an incandescent or fluorescent light bulb (typically quoted as 1,200 and 10,000 hours respectively) and it’s easy to see which type of lighting is the clear winner.

A third reason people consider making the switch to LED panel lighting is because LED light panels use less power and offer superior brightness in comparison to fluorescent or incandescent lighting. Because LED panel lights use less power, you can expect to see a reduction in your overall energy costs following installation.

There are many reasons why you should consider switching to LED panel lights for your indoor lighting needs. Not only can they add a simplistic, yet modern touch to any area, but they also last longer and use less energy than fluorescent or incandescent light bulbs. So what are you waiting for? Make the switch to LED panel lights today!

Keep Your Family Safe with These Five Automatic Garage Doors Safety Tips

Automatic garage doors are a wonderful convenience that, when properly maintained and used responsibly, can be a safe and welcomed addition to any home with a garage. Here are five safety tips that will help keep your family safe around your automatic garage door.

Never let children play with a garage door remote controls.

Garage door remote controls are not toys and as such, should be kept out of children’s hands as a safety precaution. Any wall-mounted garage door controls should also be placed well out of the reach of small children.

Teach your children about garage door safety.

Teaching children why they should never play around a garage door, regardless of if it is open or closed, can help keep them from entering into potentially dangerous situations. It’s also worth mentioning that all hands should stay off the garage door while it’s in motion.

Learn the location of your garage door’s emergency release feature.

Once you know where the door’s emergency release feature is located, be sure that you know how to use it. Also, keep the area around the door’s emergency release mechanism clutter-free so you can easily activate the emergency release if needed.

Occasionally inspect the garage door and its components for wear.

If anything looks amiss during the inspection, a trained professional should be called to make any necessary repairs. Many parts in a garage door assembly, like its springs and cables, are under extreme tension and can cause serious injury if mishandled.

Check to see if your garage door has an automatic reversing mechanism.

If your garage door does have an automatic reversing mechanism, occasionally test that the mechanism is functioning properly by placing something in the door’s path. If your setup doesn’t currently have such a mechanism, consider upgrading to a newer model garage door that does.

So there you have it. By following these five simple safety tips, your family can stay safe while enjoying the conveniences of having an automatic garage door.

Conserving Water: In the Kitchen

It is a good idea to conserve water around the house because it benefits the environment while reducing your water bills. If you’d like to start conserving water, a great place to start is in the kitchen. It can be as easy as using the refrigerator to cool water, washing food in a basin, or changing the may you wash your dishes. Details for each suggestion are listed below.

Cool Water in the Refrigerator

Instead of letting the tap run each time you want a glass of water, keep a container of drinking water in the refrigerator. Because it will no longer be necessary to run the tap until the water is cold, much less water will be wasted.

As an added benefit, some containers are equipped with a water filter that can better purify your home’s tap water. Though most tap water is adequately filtered before reaching your home, a second filter can help remove additional contaminants.

Wash Food in a Basin

If you find yourself washing fruits and vegetables under a running faucet, consider using a water-filled basin instead. Your produce can be cleaned just as well while conserving a great deal of water in the process.

Should a clean basin not be available, a well cleaned sink will work just as well. Just insert the stopper and fill the sink with enough water to thoroughly wash your fruits and vegetables. A short rinse under the tap may be required.

Change Your Dishwashing Strategy

Do not run your dishwasher unless you have a full load of dishes ready to be washed. Because the same amount of water will be used regardless of the load size, the fewer loads you wash, the less water will be used. If you plan to buy a new dishwasher, look for a water efficient model.

Alternately, if you hand wash your dishes, don’t run a continuous stream of water for rinsing. If possible, use a second sink for rinse water. If you only have one sink, wait to rinse your dishes until the dish rack is full. Then, fill a container with warm water to rinse all of the washed dishes at once.

Many people are looking for ways to use less water at home. As the average kitchen uses a large amount of water, it can be a great place to start conserving. By cooling water in the refrigerator, washing your food in a basin, and changing your dishwashing strategy you will not only help the environment but also lower your water bills.

Conserving Water: In the Bathroom

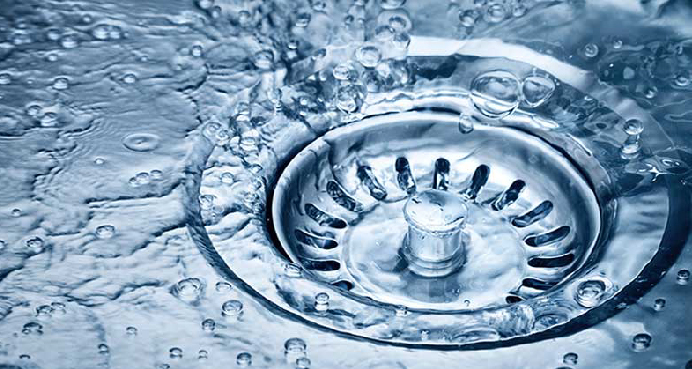
With the world’s fresh water supply quickly diminishing, many people are looking for ways to conserve water around the house. One of the best rooms to start in is the bathroom. By following some simple water-saving tips, we can all do our part to help stop the growing problem of wasted water.

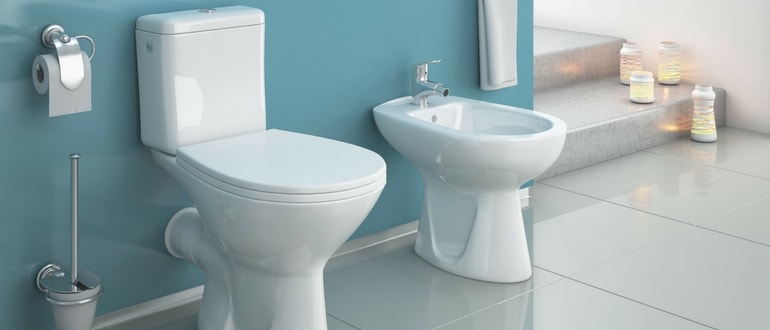
Water Conservation Ideas for the Toilet

Toilets play a major part in the overall water usage of many bathrooms. If possible, consider switching to a low-flow toilet or one that allows for dual flushing options. Both types of toilet use considerably less water than an older-style toilet.

If you can’t afford to buy a new toilet, a cheap way to convert your current one is to insert a water displacement device in the tank. This will lower the water volume that is able to be stored, saving you water with every flush.

If you are unable to buy a water displacement device, consider making your own with a plastic bottle filled with sand and water. This will work just as well to decrease your water usage. It is important, however, not to go overboard with this method, as adding too large of a bottle will prevent the toilet from working properly.

It is also important that you check whether or not your toilet is leaking water. A small leak may not seem important, but the wasted water can add up substantially over time if it is not repaired. The easiest way to check for a leak is to add food coloring to the tank, wait, and return after 30 minutes. If you find that some of the color has made it into the toilet bowl, then you have a leak that should be repaired.

Water Conservation Ideas for the Shower

Taking a quick shower uses less water than taking a bath. Because of this, it is often recommended that those wishing to conserve water in the bathroom switch to taking quick showers whenever possible. If you tend to take long showers however, a bath may actually use less water.

A good way to determine the amount of water that you use per shower is to insert the bathtub plug and measure the depth of water that is collected. If the water is less than you would use for a bath, then you’d be conserving water by taking a shower.

If you find you are using a lot of water as you shower, consider trying what is known as a navy shower. Used on naval ships where fresh water is in short supply, this method is excellent for conserving water. First, leave the water on long enough to become fully wet. Then, turn the water off and lather up with soap and shampoo. Finally, turn the water back on just long enough to rinse yourself clean.

If you haven’t already, you should also consider switching to a low-flow showerhead. These inexpensive items are simple to install and can save a great deal of water without putting a negative impact on your overall shower experience.

When shopping for a low-flow showerhead, you’ll probably notice there are two types to choose from. Aerating showerheads are the more popular of the two and will mix air with the water to maintain steady water pressure. The non-aerating verity allows for warmer water temperature and provides a pulsating pressure.

Water Conservation Ideas for the Bathroom Sink

Though a typical bathroom sink uses less water than a toilet or shower, it is still a great place to conserve water. As it is used multiple times a day, there is great potential for reducing the total amount of water used.

To conserve water while using the bathroom sink, you should ensure that the tap contains an aerator. Working on the same principle as an aerating showerhead, a tap aerator adds air to the water allowing for higher water pressure, while using less water.

Another suggestion is turning off the water when running it isn’t necessary. By using less water during tasks like brushing your teeth or shaving, your overall water usage can be lowered significantly.

To use less water while brushing your teeth, simply turn off the water until you need to rinse. To conserve water while shaving, plug the sink and fill it with a few inches of water. Rinsing a razor in a plugged sink will work just as well as holding it under a running faucet, but will use much less water.

There are many ways to conserve water around the house, especially when we focus on saving water in the bathroom. In changing some of our daily habits, a lot of water can be saved over the long term. By following a few simple tips, we can do our part to end the problem of wasted water in the bathroom.